Pages

Friday, October 4, 2013

Let there be light.....

I didn't wake up that morning expecting to re-do my entryway. It just sorta happened.

I tend to categorize my favorite thrift stores by items: one has a wonderful book section, another has awesome clothes and so forth. The CHKD in Churchland has great linen and housewares.  I mean really great.

I walked in one Saturday and found this.....

 
and this....


 Be still my heart.

The floral pattern was a standard 84 inch panel and cost  $3.99. The three or four yards of navy check was $2.99

When I saw it, a new project formed in my mind: my entryway.

 I didn't take a before picture, but the downstairs walls were brown uppers with a white modified board and batten treatment below.  Here's a pic I snapped as a sneak peak a while back.


The wall leading upstairs was beige, as that wall covered in brown paint would be too overpowering. Each window had a cornice board and swagged panel in burgundy.

I got the wall hanging from the same thrift store a few years ago.


 I used the checked material on the cornice board and swagged the print panel. I bought a pair of lace café panels at another thrift store for a buck.


The cornice board is a thrift store find from 5 or 6 years ago. It had a blue and yellow checked material before I recovered it in the burgundy cloth. For a millisecond I considered leaving it as it was, but these pastel shades didn't match the darker floral panel.


A few minutes with a glue gun and we were done. Umm, after I got Max out of the way.


There was only one of the patterned panels for the swag, so I used a light green sheer that I already owned to swag the window at the top of the stairs. I'm not bothered that they don't match. The cornice board is the same for both and that ties them together. The green swag better fits the décor in the upstairs landing.


The walls needed to change as the downstairs walls were too dark. I also wanted the downstairs walls and the wall leading upstairs to be the same (lighter) color.

Not a problem.  I'm a big fan of 'oops' paint--paint that has been returned to stores because shoppers changed their mind about the tint. Stores like Sears, WalMart, Lowe's and Home Depot resell this returned paint at drastic mark-downs.

I love, love, love Behr paint, especially the formula with the primer mixed in. You could easily pay $30 for their Signature line. I went to Lowe's in hopes that I'd find a lighter beige paint and looky here:


Next issue: the former wall hanging between the two windows, while perfect for the former space, not longer worked with this changeover.  I didn't see it as a problem. I wanted another wall hanging, but didn't expect lighting to strike twice, so I put it out of my mind, expecting to find the right thing at the right time.

I no longer work myself into a torrent during my home projects, convinced that if I don't locate the perfect item, my transformation will be a failure. I've now adopted the policy that the right thing will eventually show up.

If I dare to shine a spiritual light on the issue, I've determined that if my work at home is a service to my family that I do unto God, then whatever I need to complete that service will be provided.

Case in point: a few weeks after the mini-makeover, I dropped by that same thrift store and found another wall hanging that fit the new décor perfectly. It's beige, nearly the same tone as the wall.  When I get the time, I plan to add ribbon to the edges to help it stand out. Dark red probably, but green may also work.

Here she is.


 Finally, I decided to paint the entire staircase in white. I was tired of the stained wood risers and felt a white semi-gloss would really lighten the area.

The following pictures show the staircase with two coats of primer. I'd planned to paint this weekend, but we're going out of town, so I'll get to it when we return.  Even with the primer, the space already looks brighter.

Here's my entryway now. 


Total cost for this project: 22 smacks plus tax.  Can't beat that!

Fabric one:        3.99
Fabric two:        2.99
Wall hanging:    3.99
Lace curtains:    1.00
Paint (beige)     10.00
White paint for stairs: already had
Primer for steps: already had

Thursday, October 3, 2013

Homeschool for Free

I enjoy shiny, new curriculum as much as the next homeschool mom, but I've discovered that if necessary, I could homeschool without spending a dime. It's true. As long as you've got a library card and/or  internet access, it's possible to teach your kids without touching your wallet.

First, make a list of the classes you'd like to teach. Contact your state's Department of Education website for a roadmap of courses if you need help.

Next, head to your library- in person or online. Most libraries now allow you to search their collection from the comfort of your home. After making a list of books that look promising, jot down the call numbers and plan some time when you can drop in and review them, or, if your library offers the service, request a hold or transfer to a branch close to you.

That's how we obtained my 11th grader's geometry book. I'm not strong in math and needed a self-teaching text with an answer key for the teacher. Harold Jacob's 'Geometry' is highly praised on a few homeschool blogs I follow.  After going to Amazon.com to read user reviews (overwhelmingly positive) and checking out the table of contents and a few pages there, I felt like I had a winner.


I discovered my library had the older second edition so I checked it out and kept renewing it.  It was the perfect fit for us.

If/when the renews run out, I'd have no problem purchasing the book, extremely happy that I didn't spend cash on a text that didn't work for us. Been there, done that.

If I hadn't gone this route, there are a number of websites that offer with math. Khan Academy is one of most popular.  You are taken step-by-step through even the most complex math operations. Khan also teaches other subjects.

http://www.khanacademy.org/

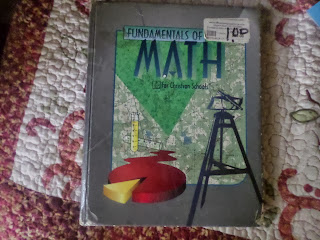
I use 'Cool Math' and 'Math is Fun' for my middle schooler. My local homeschool store (www.MooreExpressions.com) had a sale on BJU math book, teacher's text and test booklet for - wait for it-- one whole dollar. That's right: $1. That's not free, but it's the next best thing.  It's an older book, but math doesn't change.


 I introduced new math facts at either 'Math is Fun' or 'Cool Math' then supplement with extra practice in the BJU text.

www.mathisfun.com


www.coolmath.com


The mom behind Easy Peasy Homeschool has a legion of thankful fans. After developing her own curriculum, she shared it online free. All subjects from first through 12th grades are included.

http://allinonehomeschool.com/

If you're a fan of the Charlotte Mason teaching method, you're in luck as a homeschooler. Ambleside Online offers grade by grade guidance resources.  Even you've never heard of the CM process, check it out. It's impressive

http://amblesideonline.org/


I plan to discuss foreign language in a separate post, but know that most libraries offer free language training. Ours in Portsmouth is called Rocket Languages and is accessed on the library's website.

 My rising 7th grader decided to study Spanish over the summer and we chose a BBC website.  A friend recommended it after firming up her Italian for a trip to Italy.  This website, coupled with a Spanish dictionary we checked out of the library, was Grace's summer language training. Click on the language you want from the box in the middle of the screen. The class is actually a 12 week novella. Extra grammar and vocabulary training is included, as well as ground history on the language and culture. My daughter enjoyed it.

http://www.bbc.co.uk/languages/

A google search of ' homeschool for free' or 'free education online' yields a wealth of resources. Take some time to research, saving appropriate sites under your 'favorites' tab with a separate file for science, math, language arts, etc.

Here are a couple more:

www.brainpop.com

http://www.freelyeducate.com/


In another post, I'll show you how to develop an effective curriculum for these sites and library books.


If you put in a little research time, you can homeschool without spending a dime.

Tuesday, October 1, 2013

Homeschool humor

This post is part of the '31 Days' series.

In addition to '31 Days of Decorating on a Dime', I'm also posting '31 Days of Common Sense Homeschooling'.  Join me every day in October as I share some of what I've learned during my homeschooling years.

 Let's get started with a little tongue-in-cheek.


Yes, you will survive homeschooling.......


Yeah, I've had days like this.....


Wait...you mean every homeschool family isn't like this?


Monday, September 30, 2013

Getting Ready for 31 Days......

After a couple years of reading the posts in the '31 Days' series, I've decided to throw caution to the wind and jump into the fray.

What's '31 Days?' you ask.  Basically, bloggers commit to posting every day during the month of October. It's a great way to connect with other bloggers and to learn a new thing or two or six.


The posts don't have to be long or scholarly not do you have to be an expert to participate. All that is needed is a passion for your chosen topic.

I've decided to post on two categories: '31 Days to Common Sense Homeschooling' and "31 Days to Decorating on a Dime,'  both of which are themes on this blog and topics I enjoy both writing and learning about.

I've already made a list of topics under each category. Under homeschooling, I'll be discussing curriculum, free or almost free homeschool and foreign language, to name a few.


Under decorating, I'll be covering a few frugal updates I've made around the house, including our fireplace, my home office and more than a few furniture transformations.


 Now all I need to do is type and link my posts to other bloggers who are doing the same.

Blog posts will begin in a few hours!!!

Wednesday, August 7, 2013

Switcheroo

What initially appeared to be three separate decorating issues has resolved itself in one fell swoop.


Issue 1:  Try as she might, my Graci just couldn't keep the shelf next to her bed organized. Originally it was a changing table, but I removed the mattress pad and declared it a shelf. Yeah, that's how I roll.

I have an aversion to closed doors (I have open kitchen shelving and have removed the doors to my dining room buffet and bookcase. It's a sickness, I'm sure.) so I was glad to have an easy, breezy storage solution for my girl.

At least that was the plan.

What actually happened was her books, Littlest Pet Shop collection and American Girl gear totally took over the space. This is how it looked the majority of the time. (Brace yourself. I'm keepin' it real here.)


Heavy sigh.

Issue 2:  The cabinet under the hanging pot rack in the kitchen was to provide needed extra storage in my kitchen. You may remember from an earlier post we didn't add upper kitchen cabinets when we redid the room some time ago. I found this former tv stand at a thrift store for 20 smacks. It was already painted this black and gold combination which matched the kitchen's Old World theme perfectly.


The problem? The interior shelving. Again, this was a tv stand, not a storage unit and the tiny interior shelf proved it. Brace yourself again, folks.

Oh, the joy of reaching for freezer bags and having three or four other things fall out. Then I had to find a kid to put it all back, cuz, really, that's what kids are for.....

See that sideboard in the dining room? We're headed there next. Nothing wrong with it. In a past life,  it was a vanity in my bedroom. Got it from a thrift as well. Best $35 bucks I've ever spent.


Here's a close-up.
 
Um, yeah....that's a cat sleeping in that bowl. Another sigh. If you've got cats, you know what I mean. That's Simon, our #2.  Samantha, #3 can be seen in the black chair on the other side of the wall in the picture above. You'll meet our first feline Sadie later in this post.


Work around me, human.....


Issue #3
The computer desk in the family room was too bulky and blocked one of the three windows. I love bright, open spaces. When I entered this room my eyes travel until they crash in this area. See what I mean? Try to ignore the steam mop, the pillow on the floor in front of the fireplace, the cat, the junky desk.....um, just block all that out and gaze at the desk. I hate it.

To add insult to injury, the tween, teen and hubby leave all manner of paper, books and stuff lying around. It drives me bonkers.

THE PLAN:
1. Recommission the sideboard into a computer desk. It'll solve two problems: No more dumping ground and open up that area.That bulky computer desk was free--given to us by a friend of hubby's years ago. It's going to freecycle or the trash heap.

2. Move the changing table/shelf from Graci's room into the kitchen. The size will fit better and I'll have shelves. Also, we're about the redo the kitchen and get white cabinets. It'll fit right in. The door has to be replaced, stickers removed and there may be a paint treatment,, but I'm sure it'll love its new home.

3. Move the shelf from the kitchen into the dining room. It's the perfect size for a sideboard. This will defininately be repainted. I'm thinking Anne Sloan chalk in red. Oooohhhh.
 
I love it when a plan comes together. Pictures soon....


Wednesday, January 2, 2013

Homeschool: How we roll....

We enjoyed a peaceful, glorious holiday at the Nichols compound. Hope yours was the same. Public school begins tomorrow in these parts, but we'll use the remainer of this week as a review then hit the ground running next Monday. Illness cancelled four days of school just before the holiday and the girls have tests to take in Latin, math, science and Bible.  We They will review tomorrow and test Thursday. Friday is our usual co-op day, but since we don't report back until next week, I'll schedule something else instead.

Nichols Academy doesn't follow the normal Monday-Friday approach to school. Six or more subjects a day for five days would drive me totally bonkers. Really. I'm sure it works for some, but I'm convinced that successful homeschools incorporate the needs and strengths of  both the parent and the child. But especially the parent. Just joking. Not really.


We follow a Monday/Wednesday and Tuesday/Thursday schedule that covers 3-4 subjects a day. That may not seem like a lot of instruction, but I can't  emphasize how much more deeply the girls get into the subjects when they can spend one and a half to two hours on each.

I keep it all straight in my handy dandy homeschool binder. The open notebook is for my girls. The rest of the binder are the classes I teach at our co-op.


Here's how our schedule works. I'll discuss curriculum in another post.

Monday/Wednesday: Bible, Latin, home ec, math

Tuesday/Thursday:  co-op homework, literature, science

On alternating Mondays, our school begins in late afternoon as we all join my husband on our church's visitation team.

Bethany (15) has drama rehearsal some Tuesdays, band and dance on Wednesdays and co-op on Fridays, where she takes logic, SAT prep, African studies and drama. She also takes an online literature/history course. Because she plans to study communication in college, she was assigned a blog this year. She's graded on set-up, maintenance and making at least two posts weekly.

Grace (12) has violin on Mondays and Girl Scouts on Wednesdays. On Fridays, she takes an entreprenuer class at the co-op and is a teacher helper in the first grade reading class.


I've reviewed the table of contents for each text book we use and mapped out a schedule for the year. Online resources, labs, research papers, Netflix and/or library support are added in. This isn't as difficult or time-consuming as it sounds, especially given our schedule. It took several hours over 2-3 days to create.

 I can't tell you how handy this is. In years past, I set apart Sunday evening to plot the week's work. Often, this time was eaten up with my freelance work or I was just plain tired and I ended up cobbling together a lesson plan the hour or so before the school day began. Bad idea.

A rushed, harried teacher without a focused teaching plan will not result in a student who enjoys learning. I can't say it enough: take the time to plan, and plan as far into the future as you can. It doesn't have to be the whole she-bang. If you've chosen the appropriate curriculum, a few lines will suffice.When sickness, appointments or life takes you temporarily off-course, it'll be easier to get back on the road. This is Beth's biology schedule for February - June 2013. It's too small to read, but I added it to show that you don't have to write your arm off to complete a yearly schedule.


When the girls come downstairs in the morning, the first thing they do is consult the dry erase board listing  chores, assignments and anything extra going on that day. I write it out the night before using my master schedule. This helps teacher and student 'see' the day. 


Each girl has a school binder. When they complete their work, it's placed in a file on my office wall to be checked. (Yeah, I'm kinda behind.....)


Gracie is a middle schooler, so I don't officially record her grades. Beth, the 10th grader, has her grades recorded on a transcipt. More on that in a later post.

We have time built into our schedule should we fall behind. Each girl has a study hall hour at Friday's co-op that can be used to catch up. Also, because daddy works nights, we're not cutting into family time should we need to study later hours, and we have on occassion.

It's important that each family follows a schedule that works for them. And by 'works' I mean creating a plan that maximizes student achievement without causing mommy to lose her marbles. If something isn't working for you, pray, seek, tweek and change until you find what does. I'd love to hear what works for your homeschool.  


Tuesday, January 1, 2013

Ceiling fan re-do

My hubby's idea of redecorating is buying a new shower curtain. Seriously. And one should only attempt that when said curtain is so old it's changing colors or falling apart. Heavy sigh.  

It came as no surprise, then, when my desire to remove the dining room ceiling fan was met with shock and disdain. I'd been threatening to do this since we moved in 15 years ago. I'm a lil' slow.

I forgot to take a 'before' shot, but this is what the fan looked like (add a layer of dust just to keep it real....)


 He: It's a perfectly good fan. Why take it down? (Husband translation: Ah, man. More work for me.)

Me: Who puts a ceiling fan over a dining room table?! (Wife translation: This is happening. Fall in line, mister.)

 
I adore pendant shades, and since hubby wasn't onboard with removing the fan, I decided to blend the two. The finished product first, then the directions. Ain't she purdy?


Another view. Me likey.


This project came in under $5. The shade is a $2.99 Goodwill find. I removed the globe, snapped it in place and it fit perfectly. I don't know exact terminology, but I didn't use what I call 'normal' lampshade, i.e., the kind that fits over the bulb on the harp and is secured by a finial. The type I used is placed on the lamp, underneath the base of the bulb.

The black spray paint cost about $2.00. The fabric is left-over from the curtain modification in this room. (I'll post on that later). 

I'd initially planned to use hot glue, but I was out of glue sticks. I had leftover spray adhesive and that worked. There were a few places I had to break out the liquid nails adhesive, but I think was due to the way I cut the fabric.

I still need to paint over the overspray and purchase a pull chain, but I'm thrilled with the outcome. Best part? Hubby loves it.